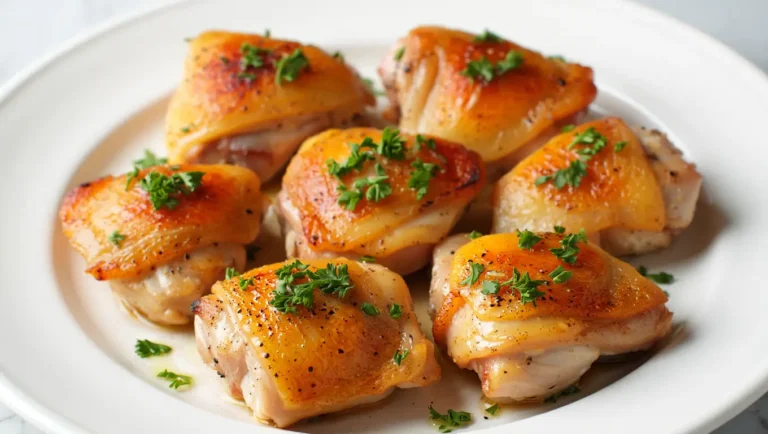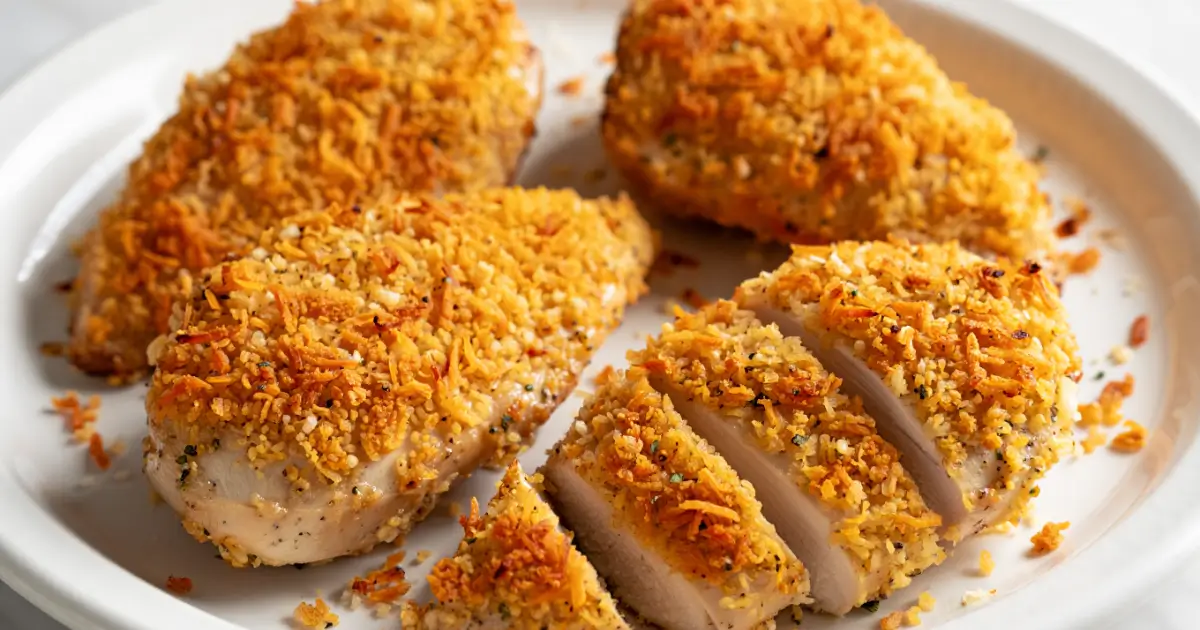
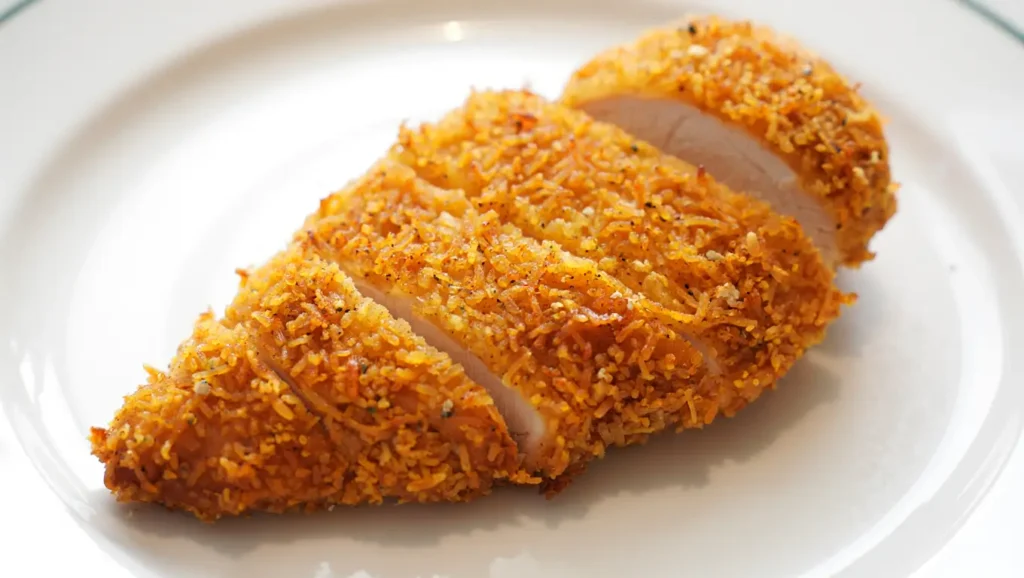
Easy Baked Panko Chicken Recipe
If you’ve been searching for a way to make crispy, golden chicken without the mess and heaviness of deep frying, look no further than baked panko chicken. This recipe combines the light, airy crunch of Japanese-style panko breadcrumbs with the juiciness of perfectly seasoned chicken breasts, creating a dish that’s both healthier and incredibly satisfying.
The beauty of baked panko chicken is that it delivers on both flavor and texture—you get that satisfying crunch when you bite into the crust, followed by tender, moist chicken inside. It’s perfect for busy weeknights, family dinners, or even weekend meal prep because it’s easy to make and pairs with almost any side dish.
Whether you keep it simple with classic seasonings or get creative with bold spices, baked panko chicken is a recipe that will quickly earn a permanent spot in your dinner rotation. It’s proof that healthy cooking doesn’t mean sacrificing flavor or satisfaction—you can have both in every bite.
Table of Contents
Why This Baked Panko Chicken Is Great
There are a lot of baked chicken recipes out there, but here’s why this one stands out:
- Extra crunchy coating – Panko breadcrumbs are larger and airier than regular breadcrumbs, which makes the crust incredibly crispy.
- Healthier than frying – You get all the flavor and crunch without soaking your chicken in oil.
- Foolproof method – Even if you’ve never breaded chicken before, I’ll walk you through it step-by-step.
- Versatile flavors – You can season the breadcrumbs however you like for endless variations.
This baked panko chicken pairs well with roasted vegetables, a fresh salad, pasta, or mashed potatoes. It’s also fantastic in wraps, sandwiches, or sliced over a salad for lunch.
Ingredients for Baked Panko Chicken
Here’s what you’ll need for this delicious recipe. I’ve included exact measurements, but feel free to adjust seasonings to your taste.
For the Chicken
- 4 boneless, skinless chicken breasts (about 1.5–2 lbs total)
- 1 teaspoon salt
- ½ teaspoon black pepper
- ½ teaspoon garlic powder
- ½ teaspoon paprika
For the Breading
- 1 cup panko breadcrumbs
- ½ cup grated Parmesan cheese (optional, but adds flavor and crispiness)
- 2 tablespoons olive oil (helps brown the panko in the oven)
- 1 teaspoon Italian seasoning (or dried oregano and basil)
- ½ teaspoon onion powder
For the Egg Wash
- 2 large eggs
- 2 tablespoons milk (or water)
Step-by-Step Cooking Instructions
Step 1: Prep Your Chicken
Start by preheating your oven to 425°F (220°C). Line a baking sheet with parchment paper or lightly grease it with cooking spray to prevent sticking.
If your chicken breasts are thick, slice them in half horizontally to create thinner cutlets. This ensures even cooking and helps prevent dry chicken.
Season both sides of each chicken piece with salt, pepper, garlic powder, and paprika. Set aside while you prepare the breading.
Step 2: Make the Panko Mixture
In a shallow bowl, combine the panko breadcrumbs, Parmesan cheese, olive oil, Italian seasoning, and onion powder.
Tip: Rubbing the olive oil into the breadcrumbs with your fingers before coating the chicken will help them toast up beautifully in the oven.
Step 3: Make the Egg Wash
In another shallow bowl, whisk together eggs and milk until smooth. This will help the panko coating stick to the chicken.
Step 4: Bread the Chicken
Dip each piece of chicken into the egg wash, allowing any excess to drip off. Then press it firmly into the panko mixture, making sure both sides are fully coated.
Place the coated chicken breasts onto your prepared baking sheet. Leave a little space between each piece so they crisp evenly.
Step 5: Bake Until Crispy
Bake in the preheated oven for 18–22 minutes, flipping the chicken halfway through for even browning. The chicken is done when the internal temperature reaches 165°F (74°C).
For extra crunch, you can broil the chicken for the last 1–2 minutes, but keep an eye on it so it doesn’t burn.
Step 6: Rest and Serve
Remove the chicken from the oven and let it rest for 5 minutes before slicing or serving. This helps keep it juicy.
Tips for the Best Baked Panko Chicken
- Toast the panko first – For an extra-crispy coating, spread the panko on a baking sheet and toast in the oven at 350°F (175°C) for 3–5 minutes before using.
- Don’t skip seasoning the chicken – This ensures flavor in every bite, not just in the crust.
- Use a wire rack – Placing the chicken on a wire rack set over your baking sheet allows hot air to circulate, making the coating even crispier.
- Pat the chicken dry – This helps the egg wash stick better, which means more panko stays on during baking.
- Don’t overbake – Use a meat thermometer to avoid dry chicken.
Ingredient Substitutions
One of the great things about this recipe is how flexible it is. Here are some swaps you can make:
- Chicken thighs – For more flavor and juiciness, use boneless, skinless thighs. Increase cooking time slightly.
- Gluten-free panko – Available in most grocery stores for those avoiding gluten.
- No Parmesan? – Use cheddar, asiago, or skip cheese entirely.
- Dairy-free – Omit the Parmesan and use unsweetened plant-based milk in the egg wash.
- Seasoning swaps – Try Cajun seasoning for a spicy kick, lemon pepper for brightness, or smoked paprika for depth.
Variations to Try
- Baked Panko Chicken Tenders – Slice chicken into strips before breading for a kid-friendly version.
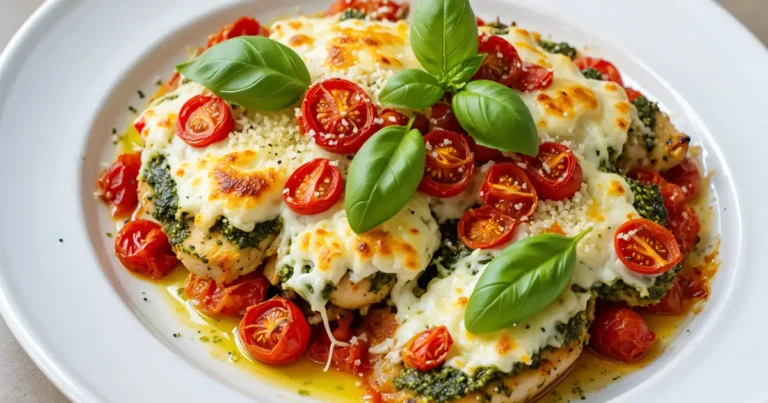
- Panko Chicken Parmesan – After baking, top with marinara sauce and mozzarella, then broil until bubbly.
- Asian-Inspired Panko Chicken – Add sesame seeds and a splash of soy sauce to the panko mixture; serve with sweet chili sauce.
- Panko Chicken Sandwiches – Serve on toasted buns with lettuce, tomato, and mayo for a crispy chicken sandwich.
What to Serve with Baked Panko Chicken
One of the best things about baked panko chicken is how well it pairs with a variety of side dishes, making it perfect for both casual dinners and special occasions. Because the flavor is versatile and the texture is crispy yet light, you can match it with anything from fresh salads to hearty comfort foods. Here are some ideas to inspire your next meal:
- Garlic mashed potatoes and steamed green beans – A classic, comforting combo that balances the crispy chicken with creamy potatoes and fresh greens.
- Roasted vegetables – Try a colorful mix of carrots, zucchini, and bell peppers for a healthy and flavorful side.
- Fresh salads – A Caesar salad or Greek salad works perfectly, adding freshness to the plate while letting the chicken shine.
- Rice pilaf or quinoa – Light yet filling, grains make an excellent base for sliced baked panko chicken.
- Simple pasta – Toss pasta with olive oil, garlic, and fresh herbs for an easy, flavorful pairing.
You can also serve it in wraps, sandwiches, or even sliced over a big leafy salad for a lighter lunch option. The possibilities are endless.
Storage and Reheating Instructions
If you’re lucky enough to have leftover baked panko chicken, you’ll want to store and reheat it properly so it stays just as delicious as when it first came out of the oven. Here’s how to do it right:
- Refrigerator – Place cooled chicken in an airtight container and store for up to 3 days. This helps maintain freshness and prevents the crust from going soft too quickly.
- Freezer – Wrap each piece tightly in foil or plastic wrap, then place them in a freezer-safe bag or container. Freeze for up to 2 months. This is perfect for quick weeknight dinners—just reheat straight from frozen.
- Reheating – For best results, reheat in a 375°F (190°C) oven for 8–10 minutes (or a little longer if frozen). This helps restore the crispy crust. Avoid microwaving, as it tends to make the panko coating soggy.
Proper storage and reheating will keep your baked panko chicken tasting fresh, flavorful, and wonderfully crispy—even the next day.
Prep Time, Cook Time, and Servings
- Prep Time: 15 minutes
- Cook Time: 20 minutes
- Total Time: 35 minutes
- Servings: 4
Conclusion
Baked panko chicken is proof that you don’t need a deep fryer to enjoy golden, crispy chicken with all the flavor and none of the excess oil. With simple pantry ingredients, minimal prep work, and easy-to-follow steps, you can have a restaurant-quality dinner ready in under 40 minutes. The light, crunchy panko coating locks in the juiciness of the chicken, making every bite tender and satisfying.
What’s great about baked panko chicken is its versatility. You can keep it simple for a quick weeknight meal, dress it up with bold seasonings for a special occasion, or even slice it into strips for salads, wraps, or sandwiches. It pairs beautifully with roasted vegetables, fresh salads, creamy pasta, or mashed potatoes, so you’ll never run out of serving ideas.
Once you try this recipe, you’ll see why baked panko chicken becomes a staple in so many kitchens—it’s healthier than frying, yet still delivers that irresistible crunch and flavor that everyone craves. Serve it hot, enjoy it fresh, and watch as it quickly disappears from the table.